Your first rule
Build a rule that reports sped-up clips in the rule editor, see it report in Premiere, then make its limit an option.
In this tutorial you build Fast clips, a rule that reports clips played faster than 200 %. You will create the rule, write its condition and message, save it, see it report a clip, and then turn the 200 % into a setting. It takes about ten minutes, and you need nothing but Premiere Pro with PPROLint.
1. Create the rule
- Open the PPROLint panel's settings and choose Rules.
- Click the New rule button, at the right of the search field, and choose New rule from scratch.

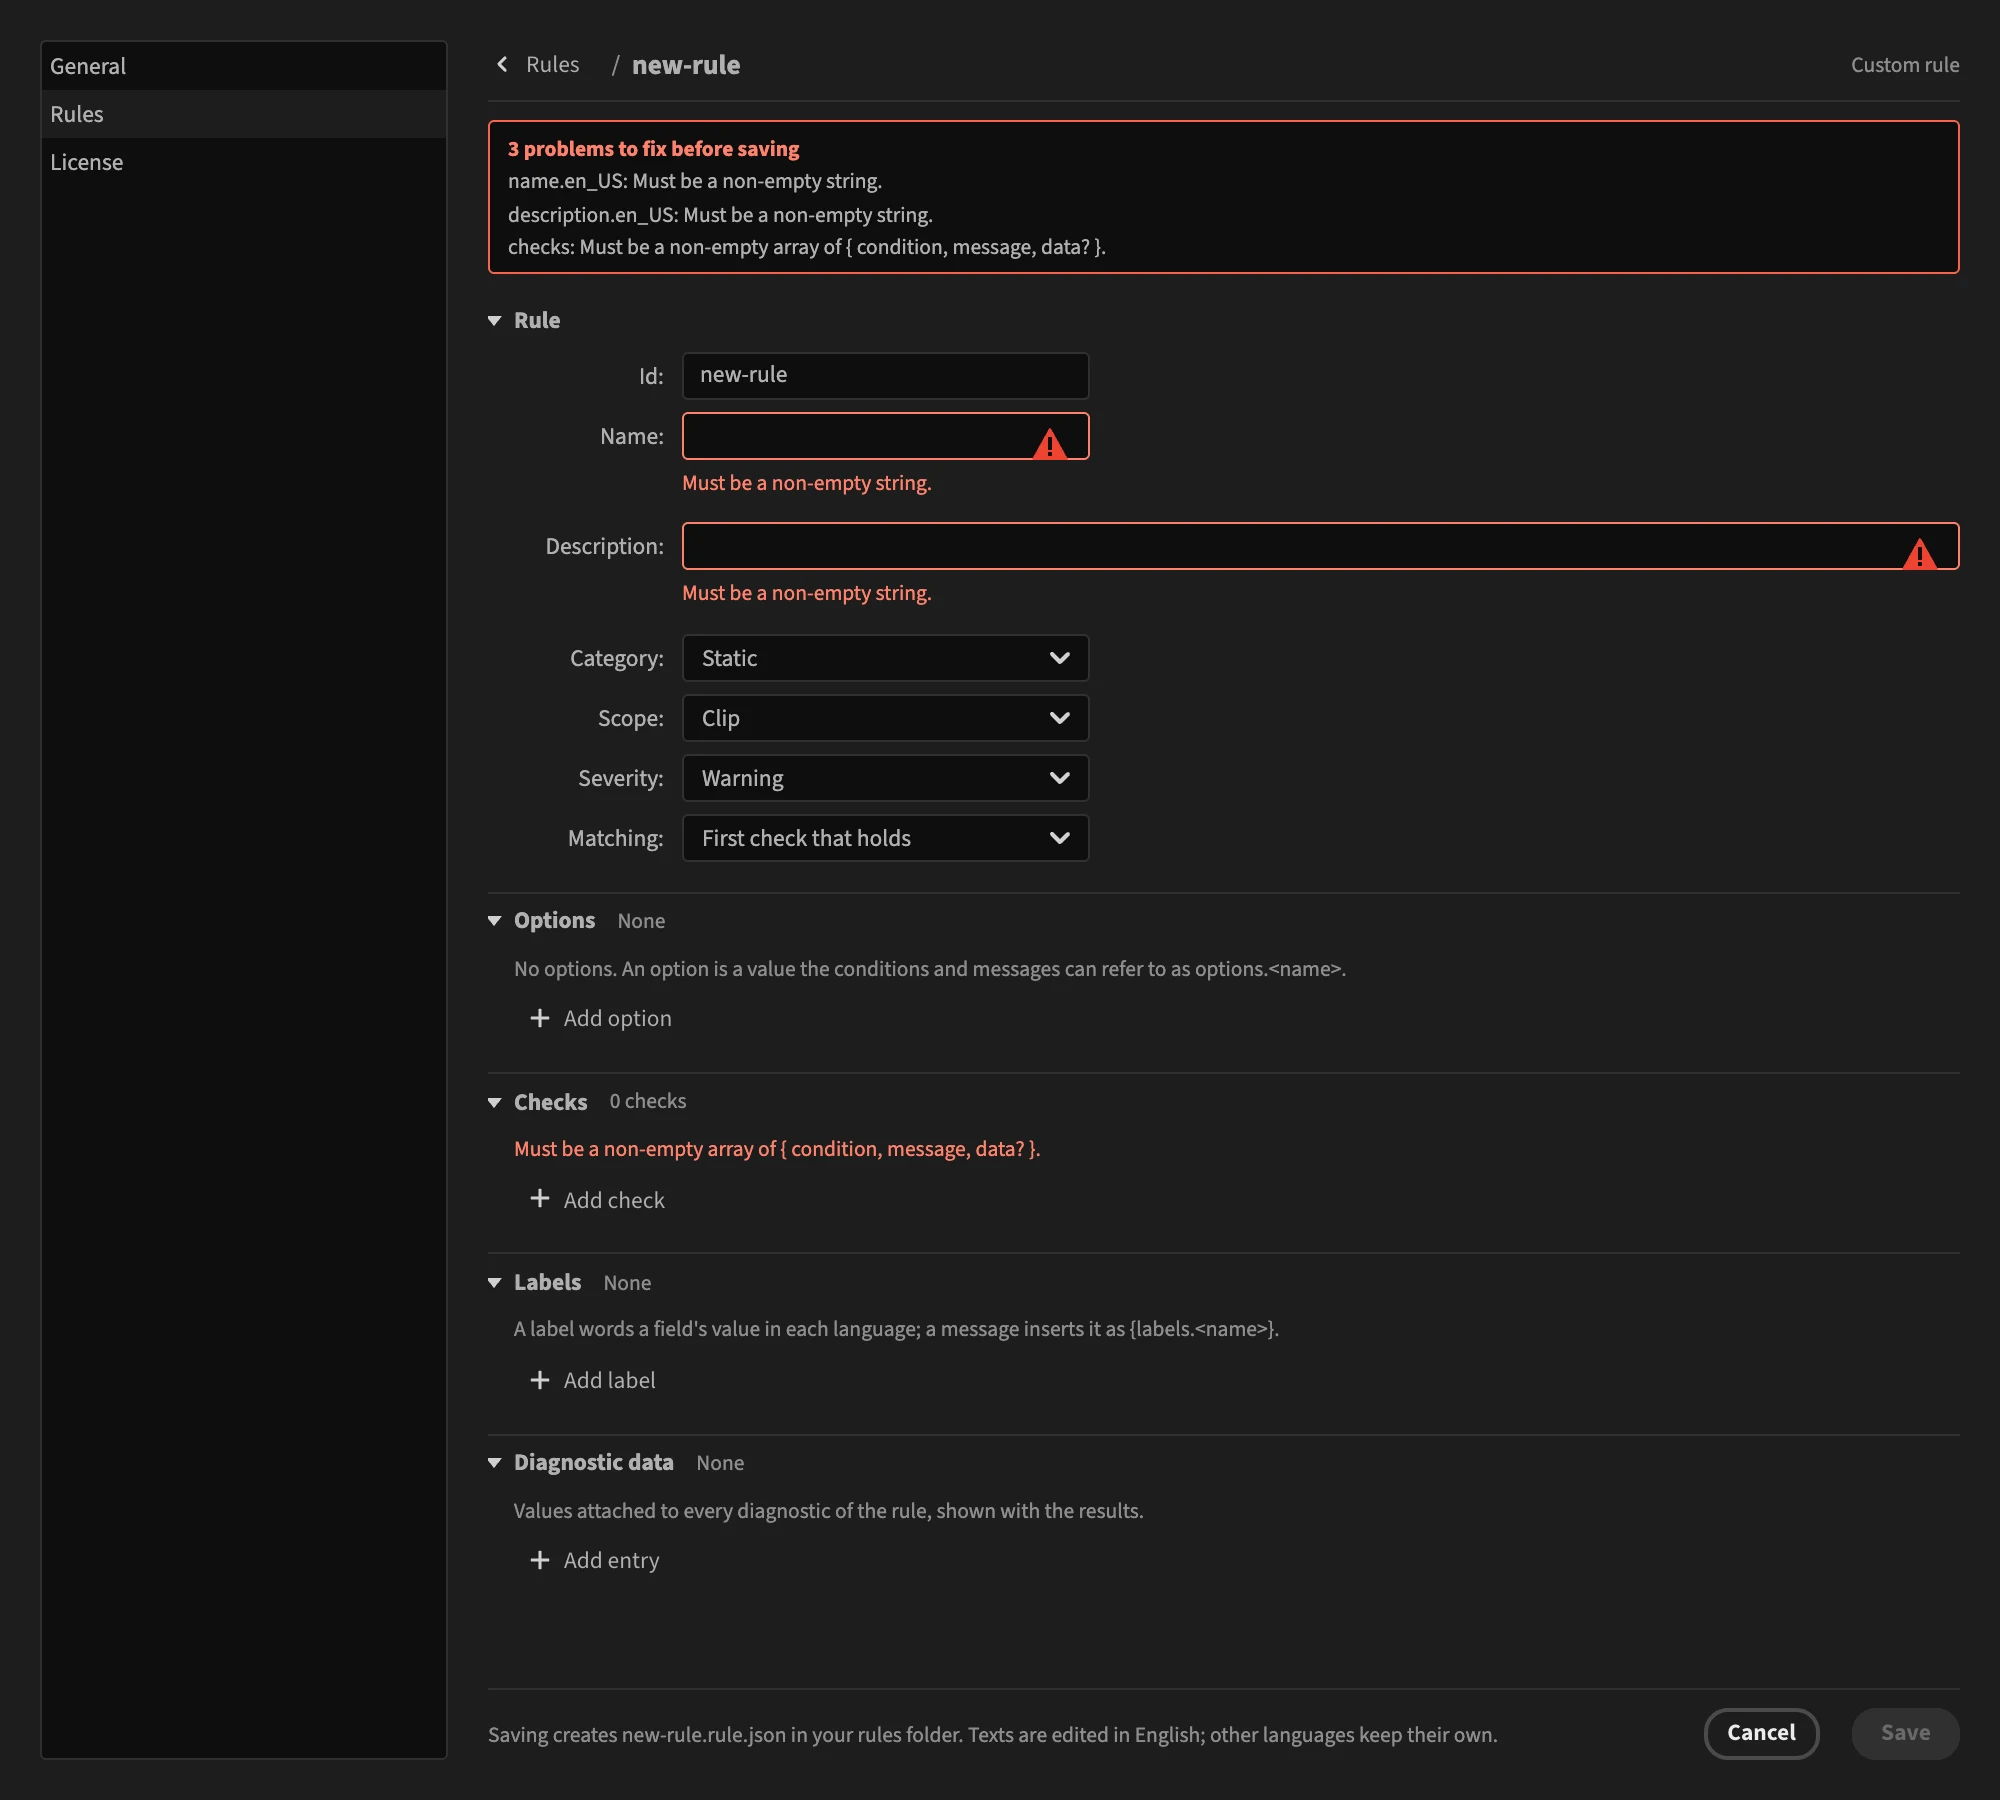
The editor opens on an empty rule. A red box already lists three problems: the rule has no name, no description and no check yet. That is expected. You fix them in the next steps, and Save turns on once the list is empty.
2. Name the rule
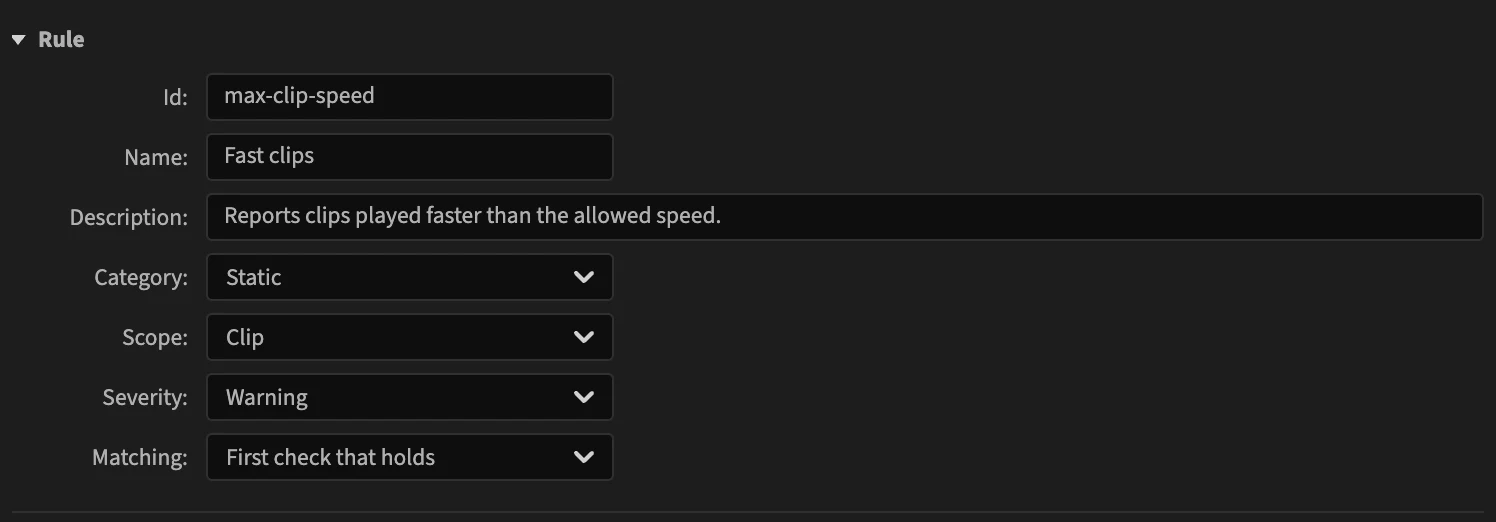
In the Rule section:
- Id:
max-clip-speed. The id is the rule's permanent name: lower-case words joined by hyphens. It can only be changed now, while the rule is new. - Name:
Fast clips. This is what the Rules settings list shows. - Description:
Reports clips played faster than the allowed speed.
Leave the other settings as they are. Scope: Clip means the rule looks at every clip of the sequence; Severity: Warning is how serious a report is.
3. Add a check
A check says when to report and what to say. In the Checks section, click Add check.
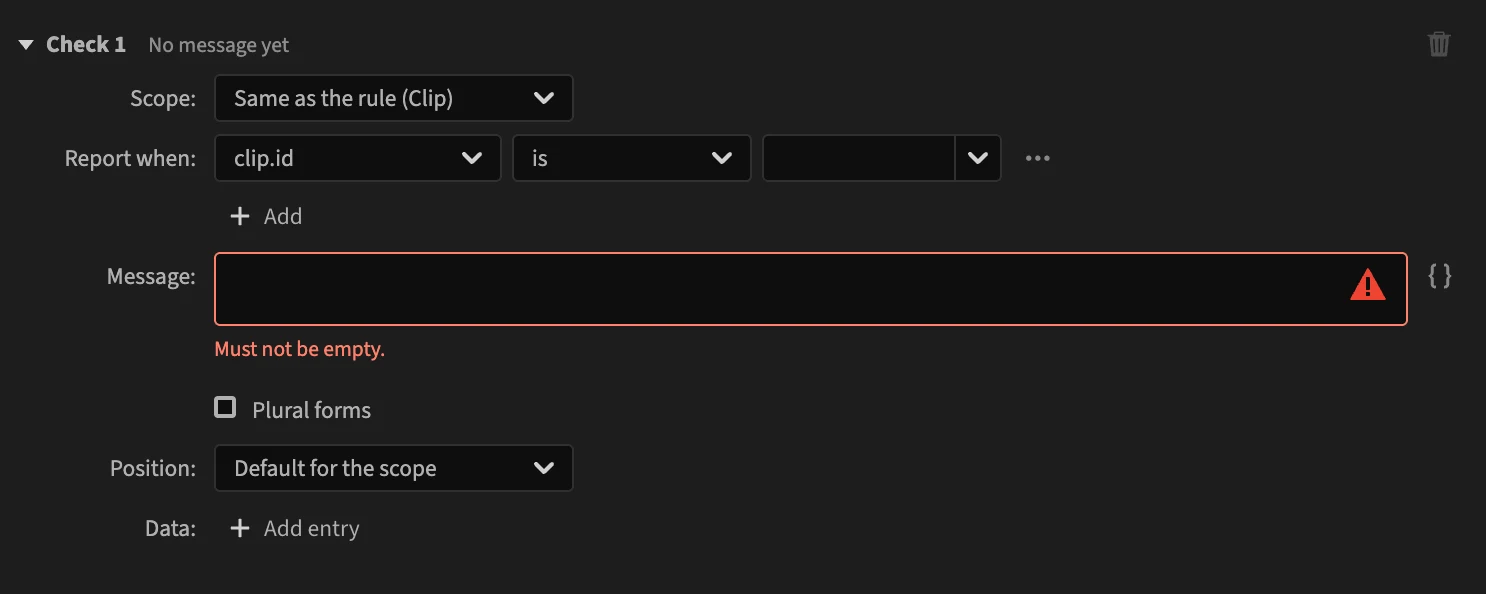
The Report when row is the condition. It reads like a sentence: field, operator, value.
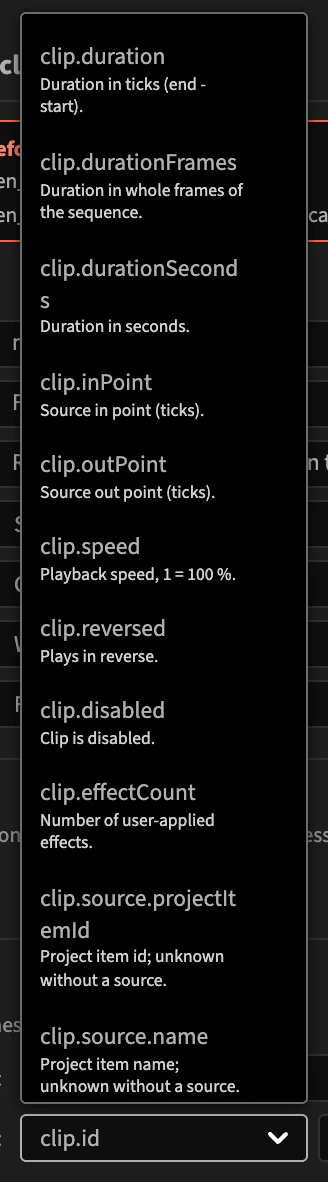
- Click the first box, which shows
clip.id, and choose clip.speed. Each field has a short description under its name;clip.speedis the playback speed, where 1 is 100 %.
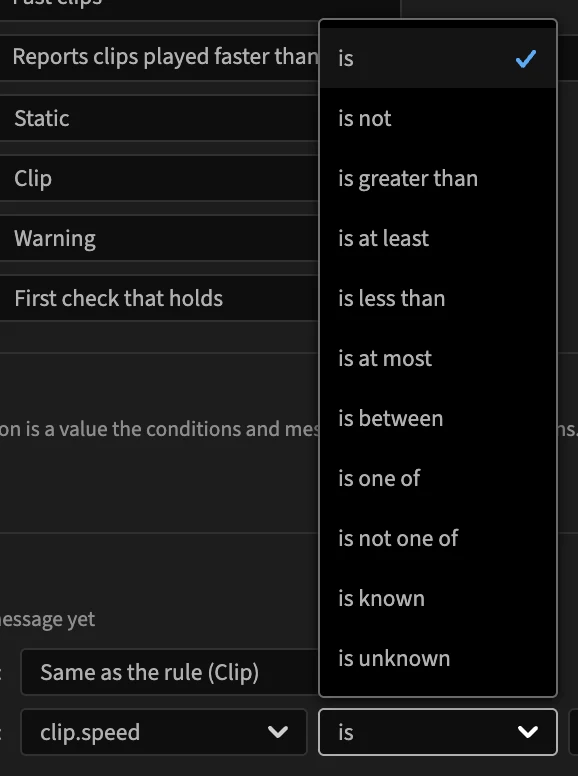
- Click the second box, the operator, and choose is greater than. The list only offers operators that make sense for a number.
- Type
2in the third box, the value.

4. Write the message
The message is what the panel shows for each clip the rule reports. A good message says which clip and why.
Type in Message: Clip "{clip.name}" on {clip.track} plays at {clip.speed}× speed.
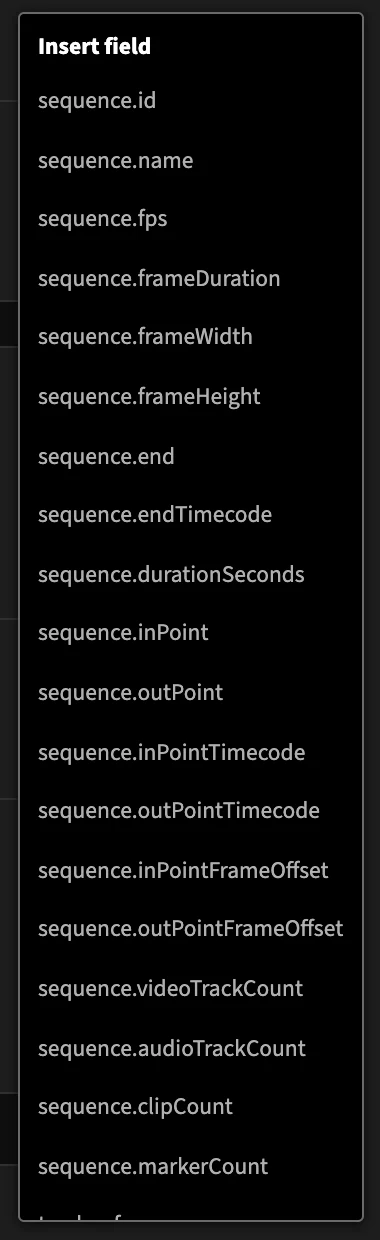
Words in braces are placeholders: PPROLint replaces {clip.name} with the clip's name, {clip.track} with its track (V1) and {clip.speed} with its speed. You don't have to type them: the button at the right of the message lists every field and inserts the one you pick.
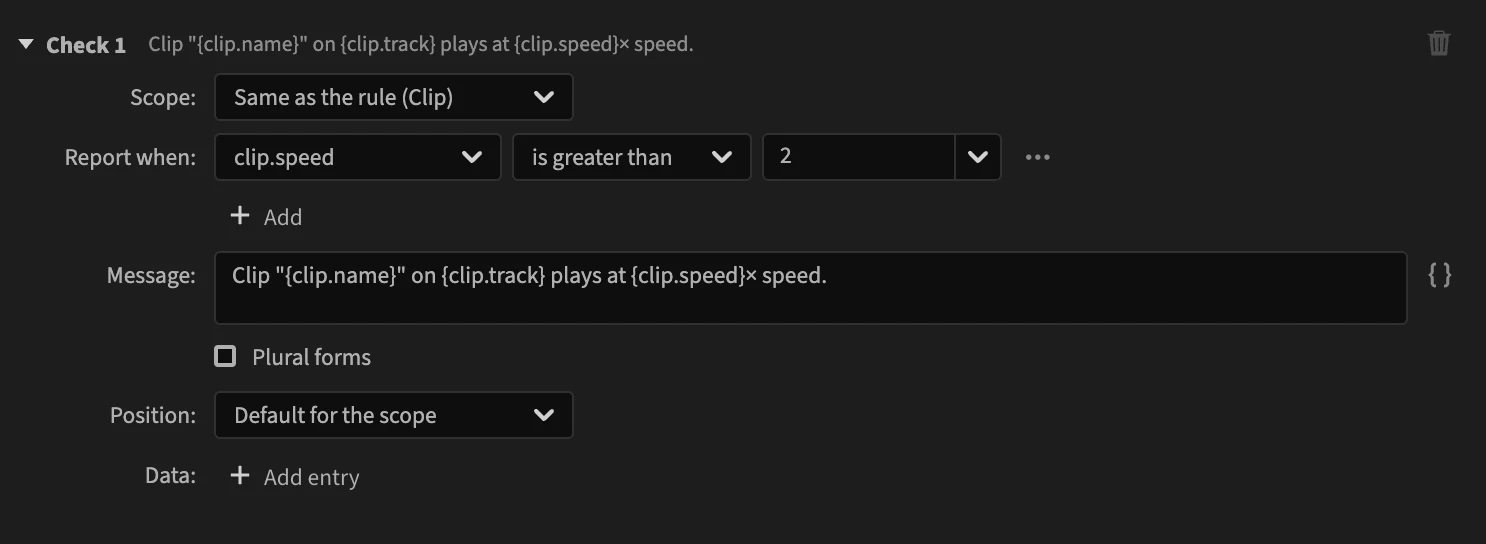
The check is complete, and the problems box is gone:
5. Save and try it
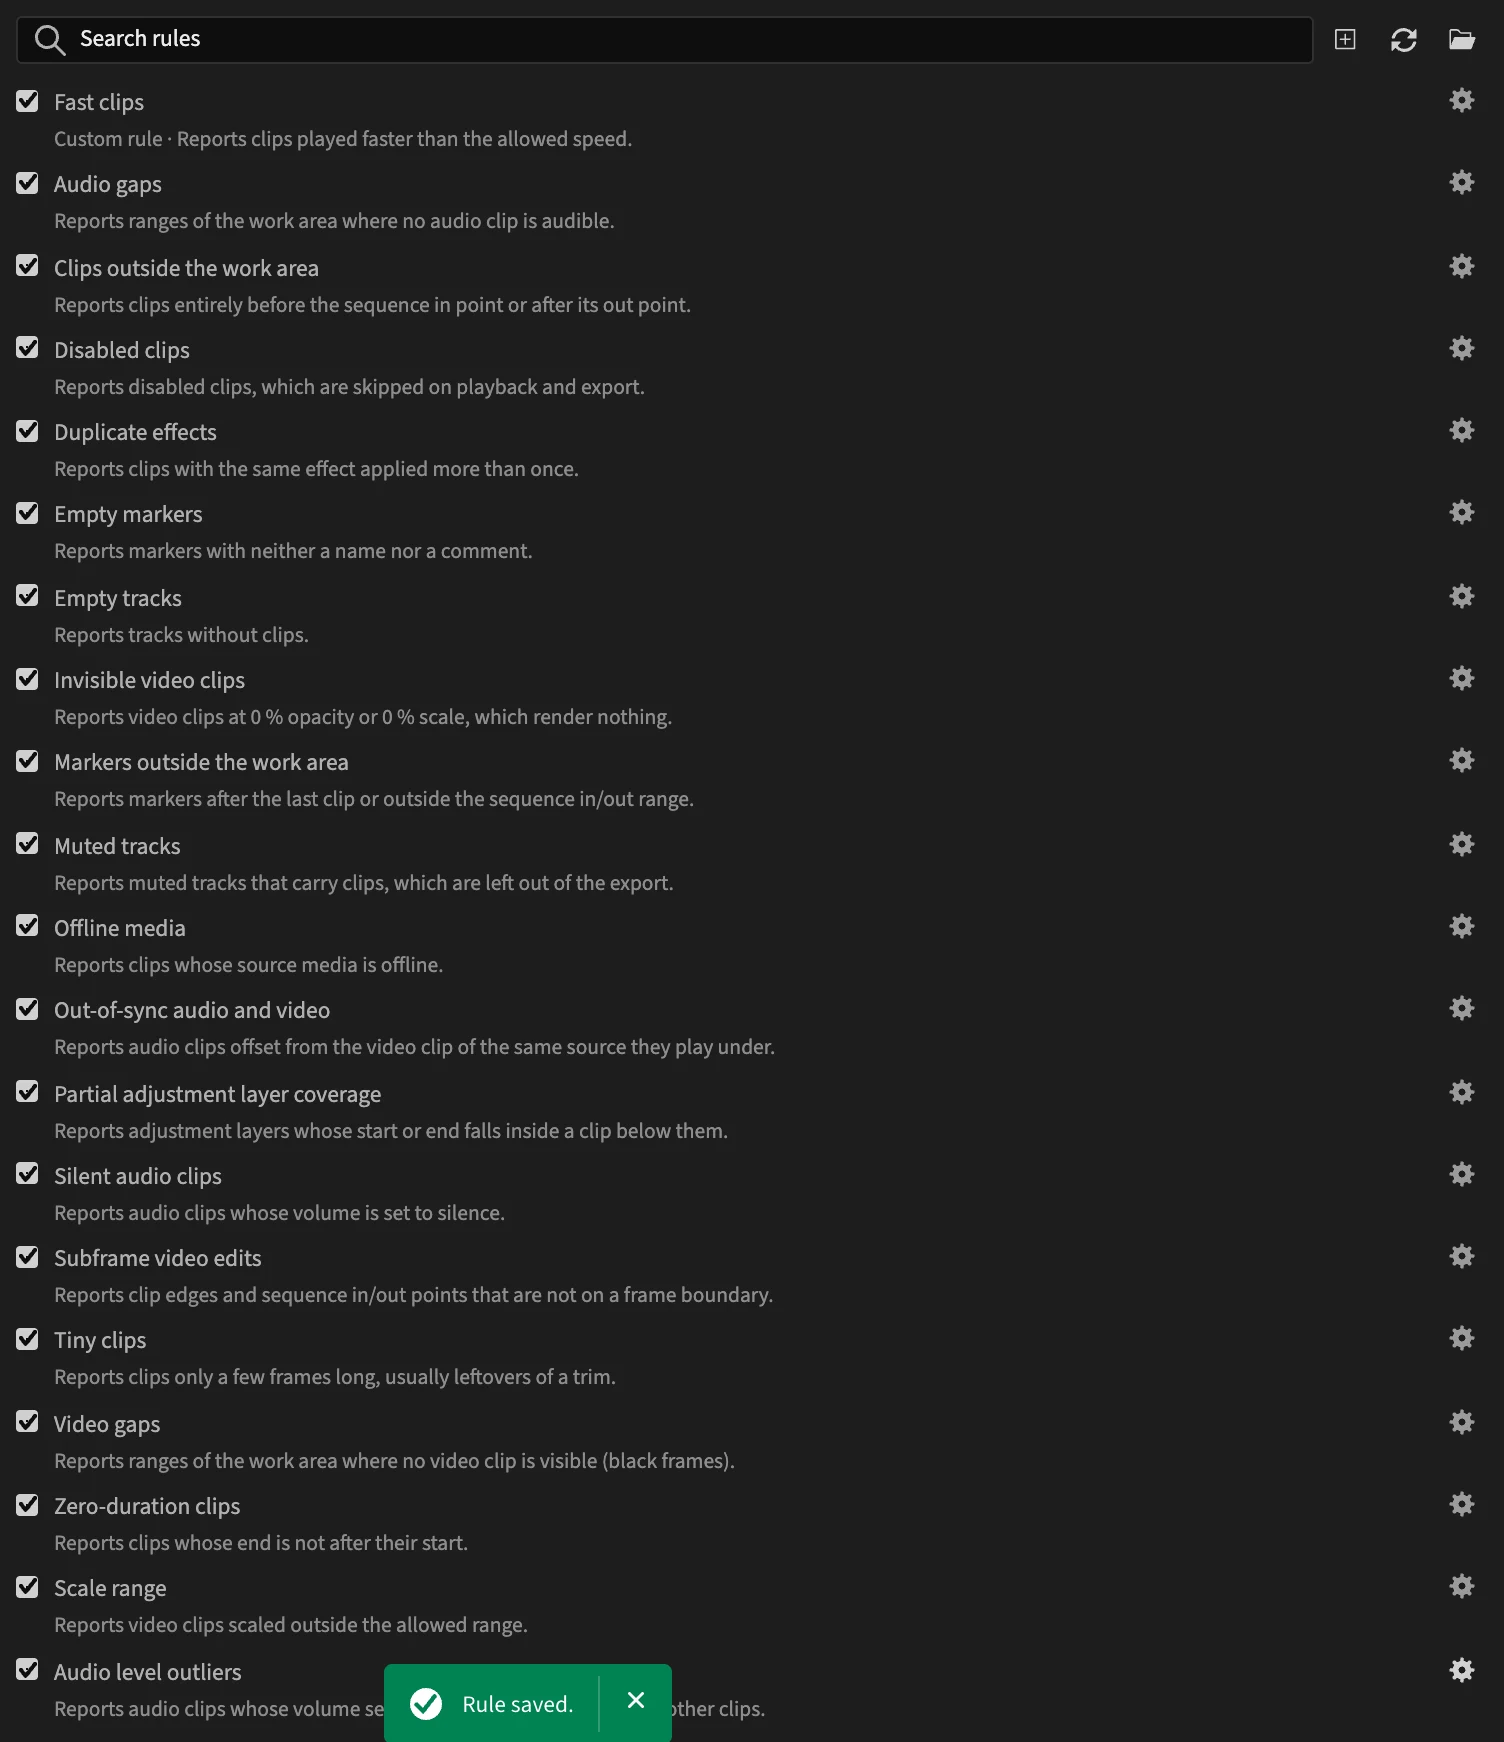
Click Save. The editor closes and Fast clips is in the list, marked Custom rule. It is on, and it runs from the next check.
To see it report, set a clip of your sequence to 300 % (Clip > Speed/Duration…). The PPROLint panel shows:
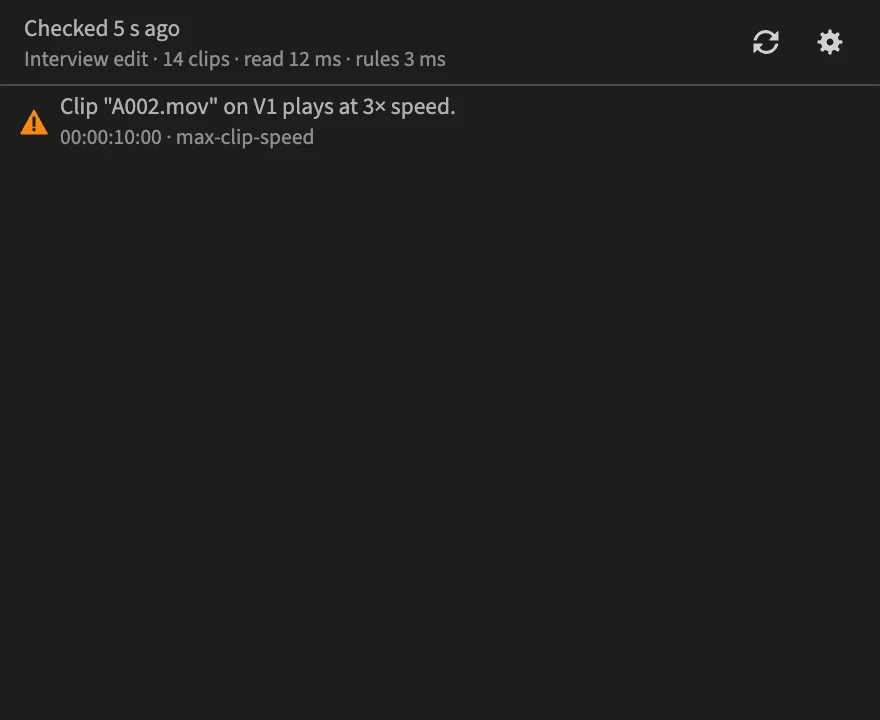
Click the result to select the clip in the timeline.
6. Make the limit an option
A fixed 200 % suits one project, not every one. An option turns the limit into a setting with a default value, which you can change later without touching the condition.
Open the rule again with its cogwheel. In Options, click Add option and fill in:
- Name:
maxSpeed - Type: Number
- Default:
2 - Description:
Highest allowed speed; 1 is 100 %.
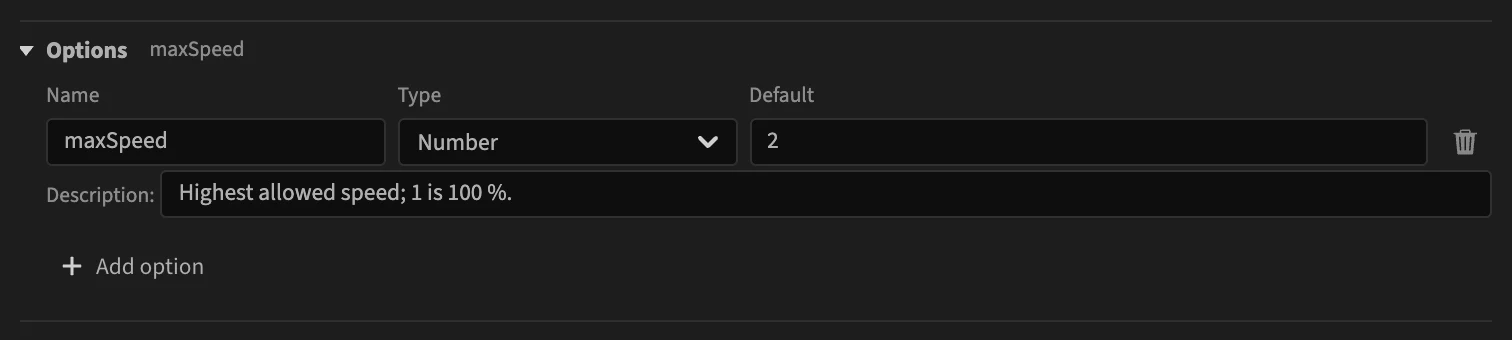
Now use it in the condition. In the value box, which still says 2, clear the text and click its arrow: the list shows the number fields and your options. Choose options.maxSpeed.

Change the message so it gives the limit too: Clip "{clip.name}" on {clip.track} plays at {clip.speed}× speed (maximum {options.maxSpeed}×).
7. Skip disabled clips
A disabled clip does not play, so its speed does not matter. Add a second condition:
- Click + Add under the condition and choose Add condition.
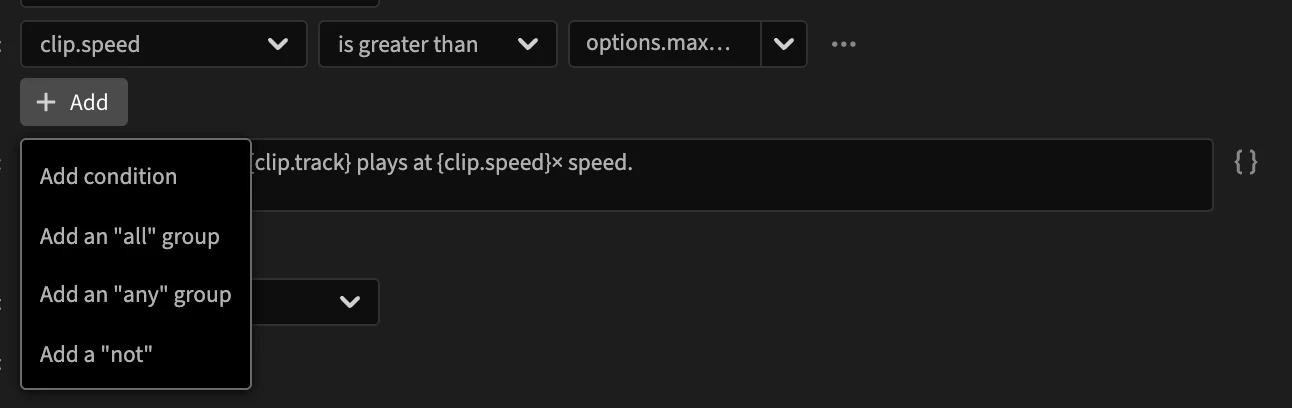
- The condition becomes a group: All of the following, which holds when every condition in it does. Set the new row to clip.disabled is No.

8. Attach the measured values
The panel can show values next to each report. In Diagnostic data, click Add entry twice and fill in two entries: speed from clip.speed, and maxSpeed from options.maxSpeed.
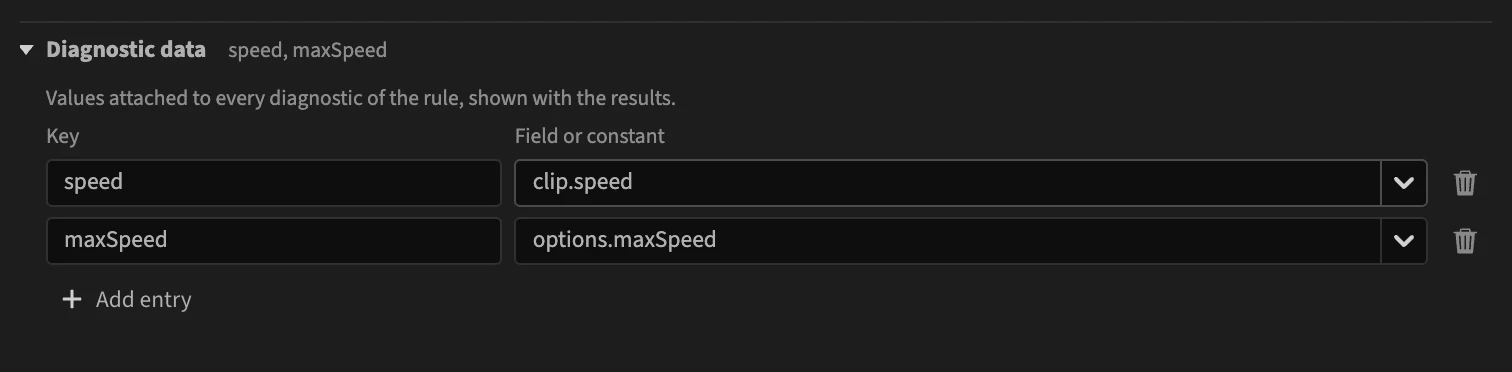
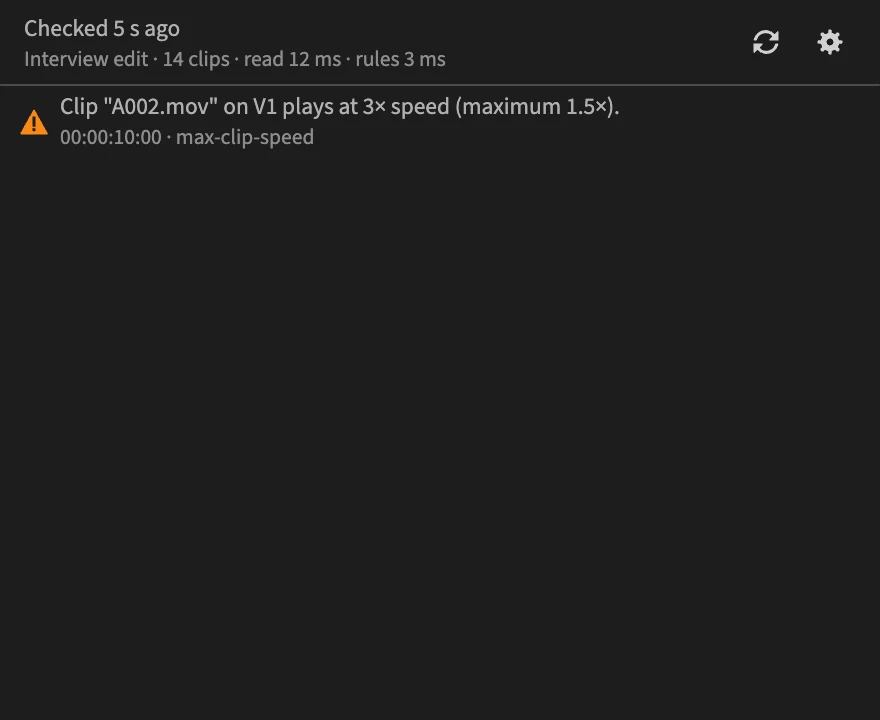
Click Save. With maxSpeed set to 1.5, the panel now reports:
What you built
Your rule is a file, max-clip-speed.rule.json, in your rules folder:
{
  "formatVersion": 1,
  "id": "max-clip-speed",
  "name": "Fast clips",
  "description": "Reports clips played faster than the allowed speed.",
  "category": "static",
  "scope": "clip",
  "severity": "warning",
  "options": {
    "maxSpeed": { "type": "number", "default": 2, "description": "Highest allowed speed; 1 is 100 %." }
  },
  "checks": [
    {
      "condition": {
        "all": [
          { "field": "clip.speed", "operator": "greaterThan", "value": { "field": "options.maxSpeed" } },
          { "field": "clip.disabled", "operator": "equals", "value": false }
        ]
      },
      "message": "Clip \"{clip.name}\" on {clip.track} plays at {clip.speed}× speed (maximum {options.maxSpeed}×)."
    }
  ],
  "data": { "speed": "clip.speed", "maxSpeed": "options.maxSpeed" }
}
Along the way you used every part of the editor that most rules need:
- the Rule section: id, name, scope, severity;
- a check with a condition and a message;
- an option, and diagnostic data.
Next, browse the recipes for more rules to build, or read How rules work.